Create a Product List or Product Detail Page Template
You can create a Product List or Product Detail page template to reuse across multiple categories and products. Create the template page with the structure and components you want to use, and then assign that page to one or more categories. When a Product List or Product Detail page is required in the storefront, the template page assigned to the category is displayed, populated with the appropriate product information.
The Storefront Reference Architecture (SFRA) includes reference page layouts and component types for creating Product List and Product Detail templates. The following procedure describes how to use those reference components to create a Product List template.
Important: The SFRA reference components are only examples of how to
implement Product List and Product Detail template pages. Typically, your developer
modifies these examples or creates other page types and component types to meet your
storefront requirements. The steps to create the page template for your storefront
vary depending on how the developer creates the page types and component types. The
following procedure assumes you are using the reference components with no
modifications, as they are provided in SFRA. This procedure is intended only to help
you understand the concepts of creating Product List and Product Detail templates.
Note: If at any point the Promotional Content Banner is the last
object on the grid wall, it drops from the page to prevent gaps. For example, If
there are 2 products on the grid wall and the Promotional Content Banner is placed
in grid 3, it doesn’t appear. This is a specific implementation of these components
delivered by SFRA. Custom component implementations can be used if this is a
problematic implementation.
-
Assign one or more categories from your catalog to the page.
For example, assign the page to the category for men's clothing. All subcategories under men's clothing are implicitly selected.

-
To select which information to display for the Product Listing component:
-
Click the Preview Settings icon at the top of the page
 .
.
-
Select the mens-clothing category for Dynamic
Attributes, and click
Apply.
 The Product Listing component is populated with men's clothing information, using the sorting rules defined in Business Manager.
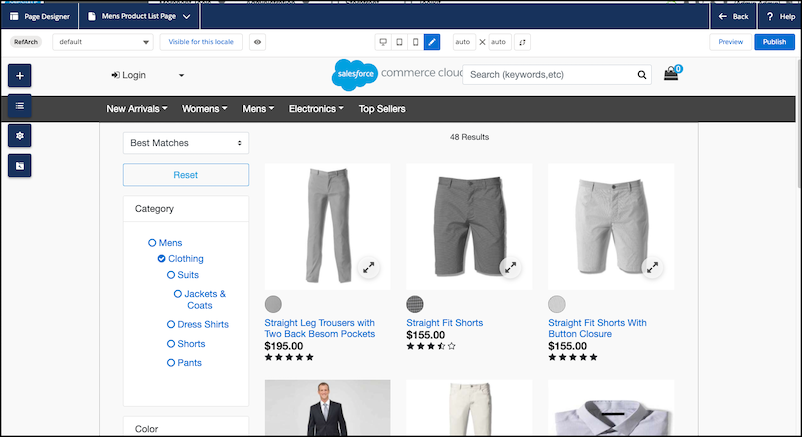
-
Click the Preview Settings icon at the top of the page
-
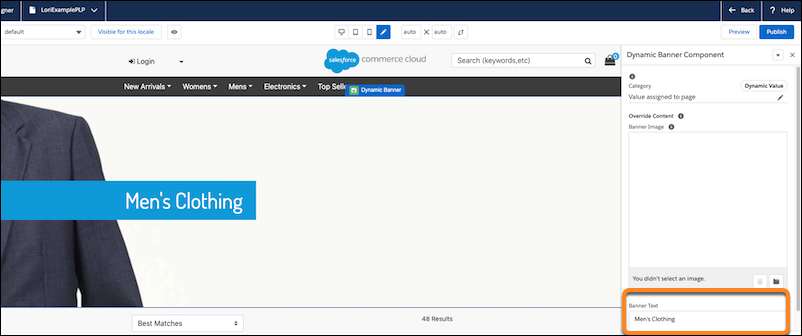
To add a Dynamic Banner to the page, click the
 icon to open the
Components menu, and then drag the Dynamic Banner
into the top region of the page.
The Dynamic Banner displays the image and text configured in Business Manager for the category displayed on the page, in this case, men's clothing.
icon to open the
Components menu, and then drag the Dynamic Banner
into the top region of the page.
The Dynamic Banner displays the image and text configured in Business Manager for the category displayed on the page, in this case, men's clothing.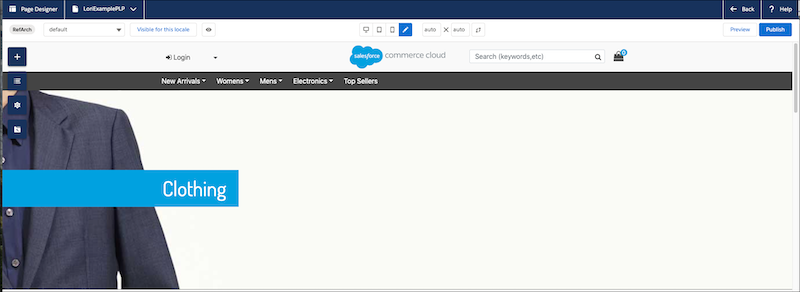
-
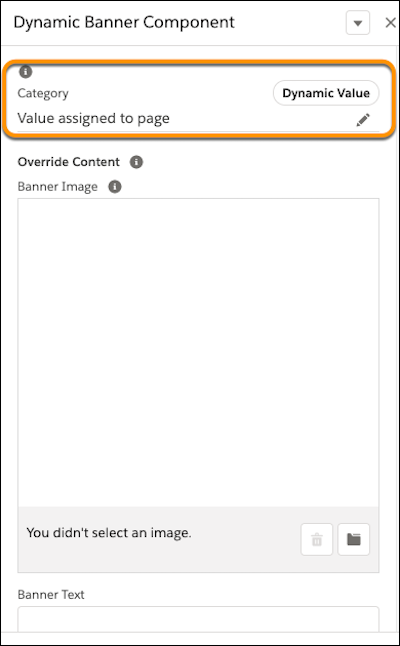
(Optional) To specify that the Dynamic Banner uses the image and text from a
category other than the one currently displayed in the page, click the edit icon
 next to Value assigned to
page. Select a different category.
next to Value assigned to
page. Select a different category.

-
To override the image or text configured in Business Manager for the category
selection, enter Banner Image or Banner Text. For example, you can specify that
the text for the banner is Men's Clothing regardless of what's configured for
the text in Business Manager.
-
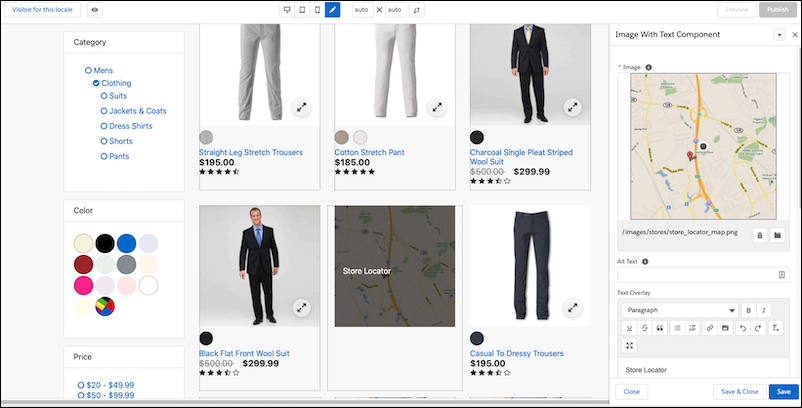
Open the Components menu by clicking the icon, and then drag the Image With Text
component into Product Listing Layout component in the main region of the
page.
Use the Image With Text component to add a static image and text within the product listing. The products displayed on the page now flow around the static image and text.
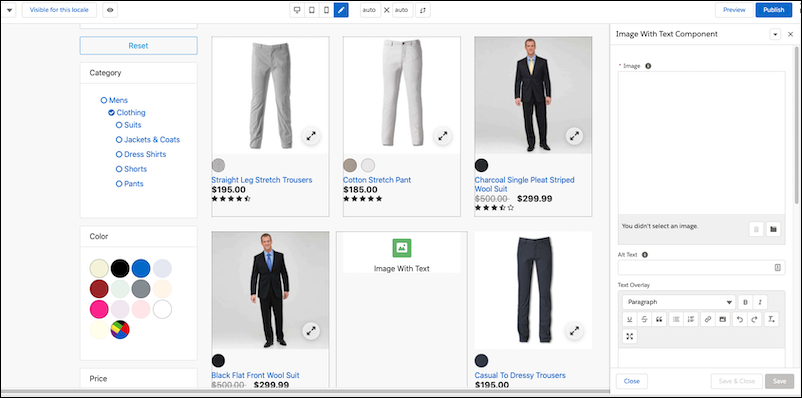
-
Configure the Image With Text component with the appropriate image and
text.