Debugging Pipelines
The Pipeline Debugger enables you to track the execution of a pipeline step-by-step within UX Studio to help you identify errors. Using the Pipeline Debugger, you can easily check the storefront behavior of pipelines, track specific pipeline sections, and monitor the status of the Pipeline Dictionary at each step using a special watch window. The Pipeline Debugger, unlike standard programming language debuggers, operates on the graphical representation of the pipeline rather than at the source code level.
When you run the Pipeline Debugger and interrogate variables or expressions, the variables and expressions are evaluated in the context of the current storefront session. Most often, the pipeline under scrutiny is triggered by an action in the storefront. It's also possible to trigger a pipeline directly, using the browser URL input box. However, such an isolated action might leave out certain session dictionary keys that the pipeline expects.
- Select a site, and click Storefront. The storefront opens in a new tab in your browser.
- Open UX Studio.
- Click the down arrow beside the
 button and select
Debug configurations from the popup menu.Note:
button and select
Debug configurations from the popup menu.Note:If you click the button instead of the down arrow, the debugger produces the following message:
The selection
                                    can't be launched and there are no recent launches.
Be sure to click the down arrow to get the popup menu.
The Debug Configurations dialog box opens.
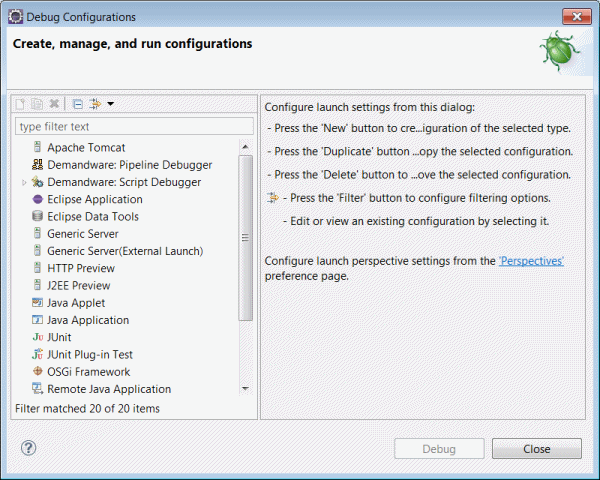
- In the Configurations window, double-click Salesforce B2C Commerce: Pipeline Debugger.
- Enter the debug session name.
- Enter the Site to Debug.
For example, Sites-SiteGenesis-Site.
- Click Debug.
- Navigate to the pipeline you want to
debug.
For example: Cart.xml
- Right-click the node in the pipeline where
you want to start debugging.
For example: Cart-PrepareView.
- Select Add/Remove Pipeline Node Breakpoint (or click the icon in the toolbar).
- Return to your storefront application.
- Navigate to the location you want to
investigate. Process until the debugger returns to Studio, indicating
that the breakpoint has been reached.
For example, add an item to the cart, and click View Cart in the cart quick view.
- Studio prompts you with the following message:
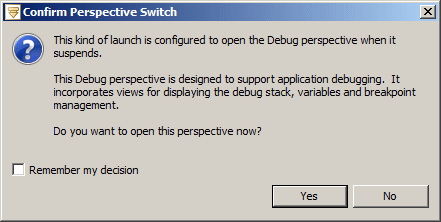
- Click Yes.
- The debugging perspective opens.
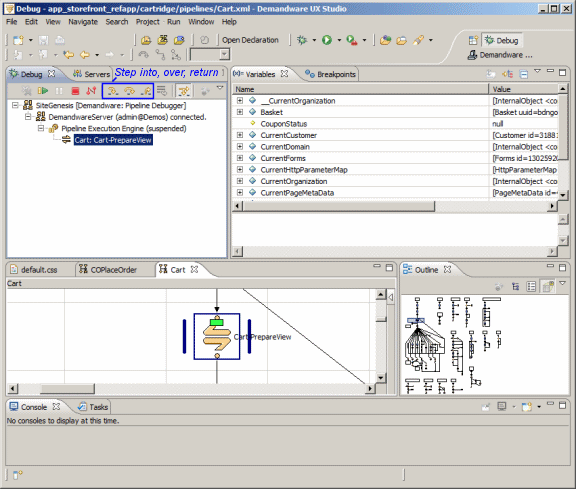
- Use the Step (Into, Over and Return) buttons to step through the pipeline to identify problem causes.