Create a Page Using the Page Designer Visual Editor
A page creation wizard walks you through the process of creating a Page Designer page in the visual editor.
To create and manage pages using the Page Designer visual
editor, a user's role must include functional permission Manage_All_Libraries in the
organization context. Or, a user’s role can include Manage_Site_Library in the context of
the site for which they are creating pages.
-
When all the information is correct, click Save &
Create.
The new page is displayed in the Visual Editor. Some dynamic pages display information based on the category or product being rendered. Typically, information from the first category assigned to the page is displayed. If no category or product is displayed on the page, or if you want to see a different category or product, click the Preview Settings icon at the top of the page
 . Select a category or
enter a product SKU for Dynamic Attributes, and click
Apply. Images and text specific to the category or product
selected are displayed on the page.
. Select a category or
enter a product SKU for Dynamic Attributes, and click
Apply. Images and text specific to the category or product
selected are displayed on the page.
-
To add new components to the page, open the Components
menu by clicking the icon.
 If the developer assigned default components to regions, those components are prepopulated on the page. If you want, you can change or remove the default components.Note: Unfortunately, there’s no UI feature available to copy a component across pages at at this time.
 -
In the right pane, configure the component attributes.
When using the rich text editor, you can format text using the Heading1, Heading2, Heading3, Heading4, and Paragraph tags. When the page is displayed in the storefront, the text’s formatting corresponds to the styles in the browser’s CSS. To open a larger window in which to edit the text, click the icon.
 Some components have dynamic attributes that by default use the category or product being rendered to determine which contents to display. To override the category or product passed to the page, click the edit icon
 next to Value assigned to page. Select a different
category.
next to Value assigned to page. Select a different
category. -
To see how the page looks for specific customers on certain dates, from different
source codes, or with different dynamic attributes, click the view icon. Adjust the
settings, and click Preview.
-
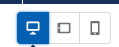
To see how the page looks on different devices, click the viewport icons.
-
To adjust the dimensions of the preview, click the edit icon , and enter the width and height in pixels.
 If you enter values that are larger than the pixel dimensions of the screen on which you are working, sometimes the width and height don’t scale correctly. If you enter custom values for the dimensions, sometimes you can’t position components on the page correctly. To automatically calculate the pixel values, click the edit icon again.
 -
To switch between portrait and landscape, click the rotate icon.
