Troubleshoot Your Server Connection
If you don't see your code changes on the server, check your server connection. These instructions use CommerceCloudServer, which is the default name for a server connection.
Only one server is active at a time, and a server must be configured to automatically upload.
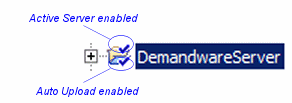
Check that the server connection has Active Server and Auto Upload selected
- Do one of the following:
- In Studio, on the Navigator tab, view the
CommerceCloudServer connection folder icon.
- On the Studio toolbar, click the Salesforce B2C Commerce Server icon, and
select the CommerceCloudServer connection.
- Click B2C Commerce Server, and ensure that Active Server and Auto Upload are selected.
- In Studio, on the Navigator tab, view the
CommerceCloudServer connection folder icon.
Check the Server Connection Configuration
- In Studio, on the Navigator tab, right-click CommerceCloudServer.
- Select B2C Commerce Server > Update Server
Configuration.
- Check that the correct instance is configured.
- Check that the correct user and password are entered.
Check Whether a Firewall is Interfering with Your Connection
It’s possible that Studio can’t access the B2C Commerce instance if your local computer is behind the firewall. Create a proxy server to establish a connection. See Creating a Proxy Server Connection for Studio. Creating a Proxy Server Connection for Studio.
Upload the Cartridge
To force an upload, on the Studio toolbar, click the Commerce Cloud server button > the CommerceCloudServer connection > Upload Cartridges. This might give you more information about the problems you are experiencing.
Reassign the Cartridge
See Reassign Cartridges from One Server Connection to Another.